A Candid Start
Not long ago, I posted a video on my social handle showing what really happens during a photoshoot — the journey from behind the scenes (BTS) to the final photography result.
The idea was simple: instead of just showing the polished images, I wanted to capture the chaos, the experiments, and the little tweaks that actually make those final shots possible.
In the video, you can see the founder of The Vintage Shutter Films himself stepping in, helping with the setup, testing different angles, and making sure the light behaved exactly how we wanted. We used diffusers, wide frame shots, and of course, went through multiple rounds of adjustments before the camera finally clicked the photos we loved.
Let me walk you through what happened — step by step.
Setting the Stage
Every shoot begins with what photographers call the setup. Think of it as preparing the canvas before painting.
The tripod was the first thing we fixed in place. A stable camera means fewer distractions and more focus on experimenting with angles and light. Then came the subject’s space — clear, minimal, and free of anything that would look messy in the background.
The founder of The Vintage Shutter Films walked into the frame several times during this stage. He’d point out things the rest of us might miss — like how a cable hanging in the corner could ruin a wide frame shot, or how a small shadow in the background could draw attention away from the subject.
Wrestling With Light
Once the basics were done, we faced the real challenge: lighting.
If you’ve ever been on a shoot, you know that light can be your best friend or your worst enemy. Our initial shots looked uneven — bright spots on one side of the face, shadows cutting across the other.
We shifted the lights. Then shifted them again. Raised them, lowered them, tilted them. Every small change created a new problem to solve. Some frames looked too flat, others too sharp.
That’s the dance of lighting setup for videos — finding the balance between brightness and softness, shadow and highlight.
The Diffuser Magic
And then came the game-changer: the diffuser.
Without it, the light felt harsh, almost clinical. Faces looked shiny, the mood didn’t feel right. But once we placed the diffuser in front of the key light, everything shifted.
The glow softened. Shadows blended smoothly. Skin tones looked natural. Suddenly, the setup went from “studio light in your face” to “professional photography with cinematic warmth.”
I still remember the moment we looked at the monitor after adding the diffuser — everyone agreed it was the shot.
Why Wide Frames Tell Bigger Stories
While most people love close-up portraits, we wanted to try something different — wide frame shots.
A wide frame doesn’t just capture the subject. It captures the atmosphere, the space, the little details in the background that tell a bigger story.
We pulled the tripod back, experimented with angles, and checked how the composition changed with every inch of movement. Some shots felt too empty, while others brought in just the right balance of environment and subject.
These experiments gave us flexibility. Wide frames can always be cropped into tighter shots later, but they give that cinematic storytelling effect no close-up can replicate.
Multiple Shots, Multiple Choices
Photography is rarely about “one perfect click.” It’s about taking multiple shots, reviewing them, and picking the one that feels right.
During this shoot, we captured dozens of frames — subtle changes in posture, slight tilts of the head, even variations in eye contact. Each version had its own character. Some felt polished, others raw, and a few had that unplanned magic we all look for.
The BTS video showed this process in action — the repeated clicks, the adjustments, the little discussions in between.
The Final Reveal
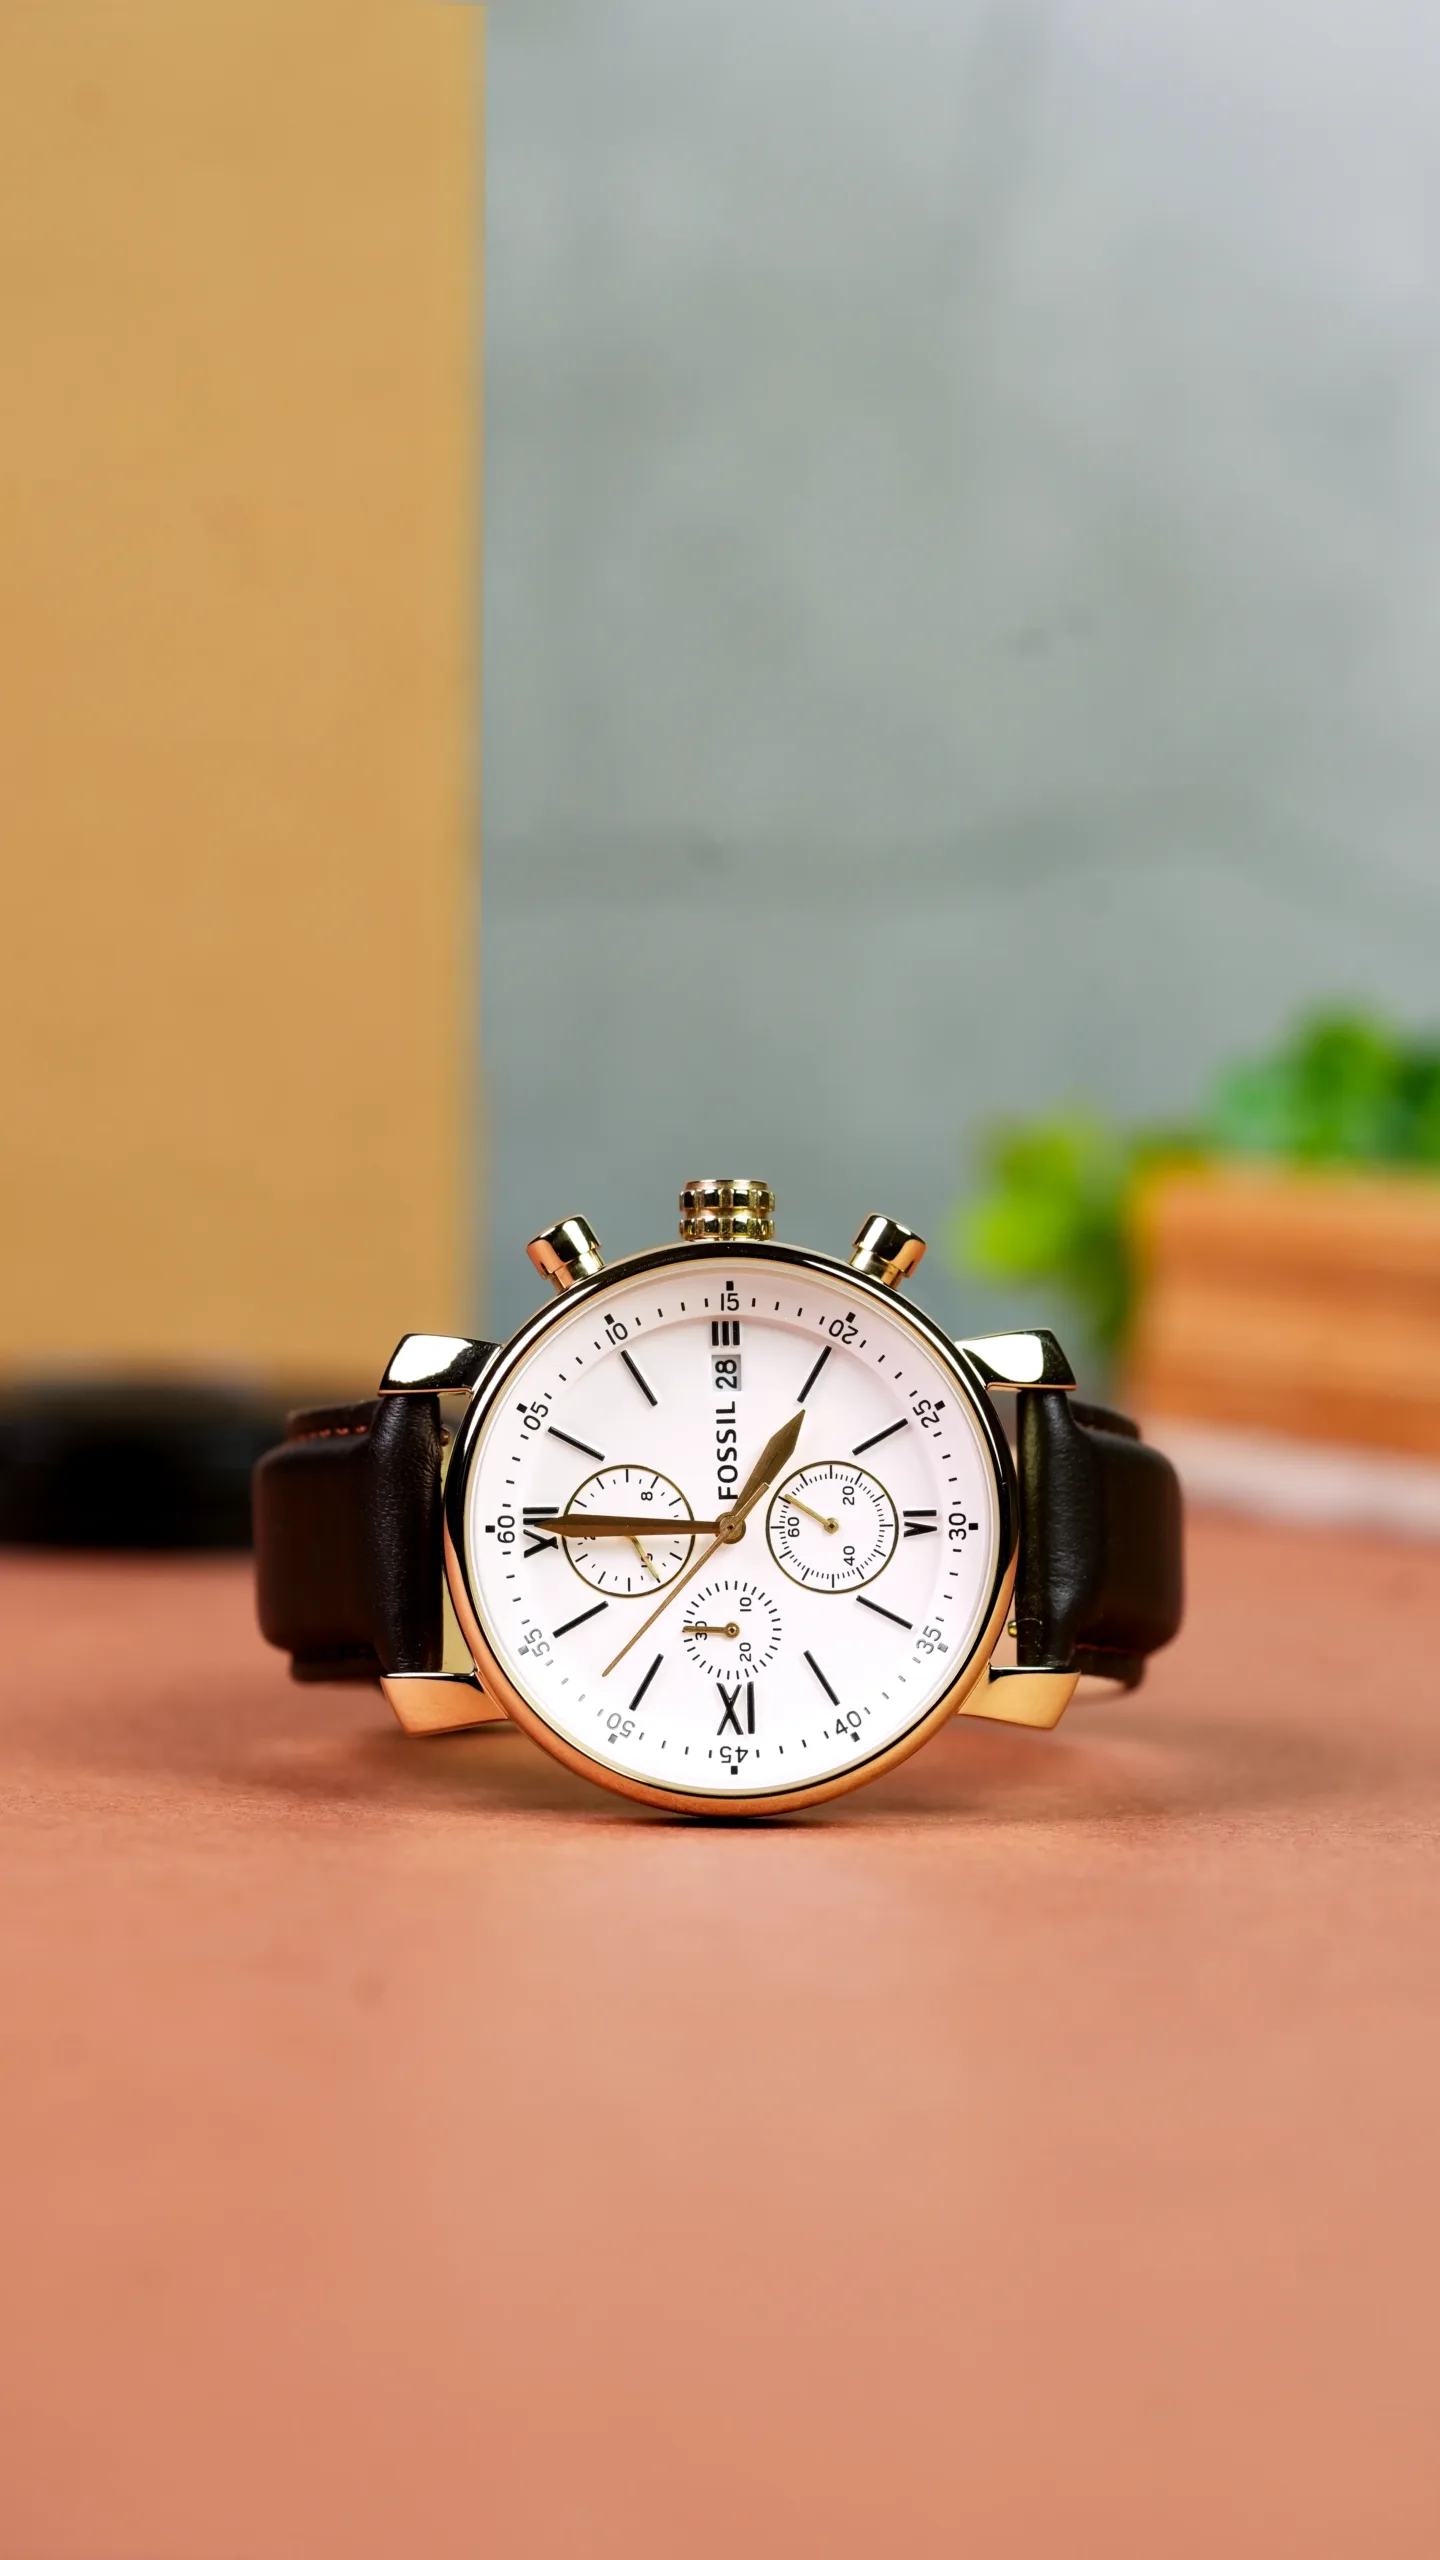
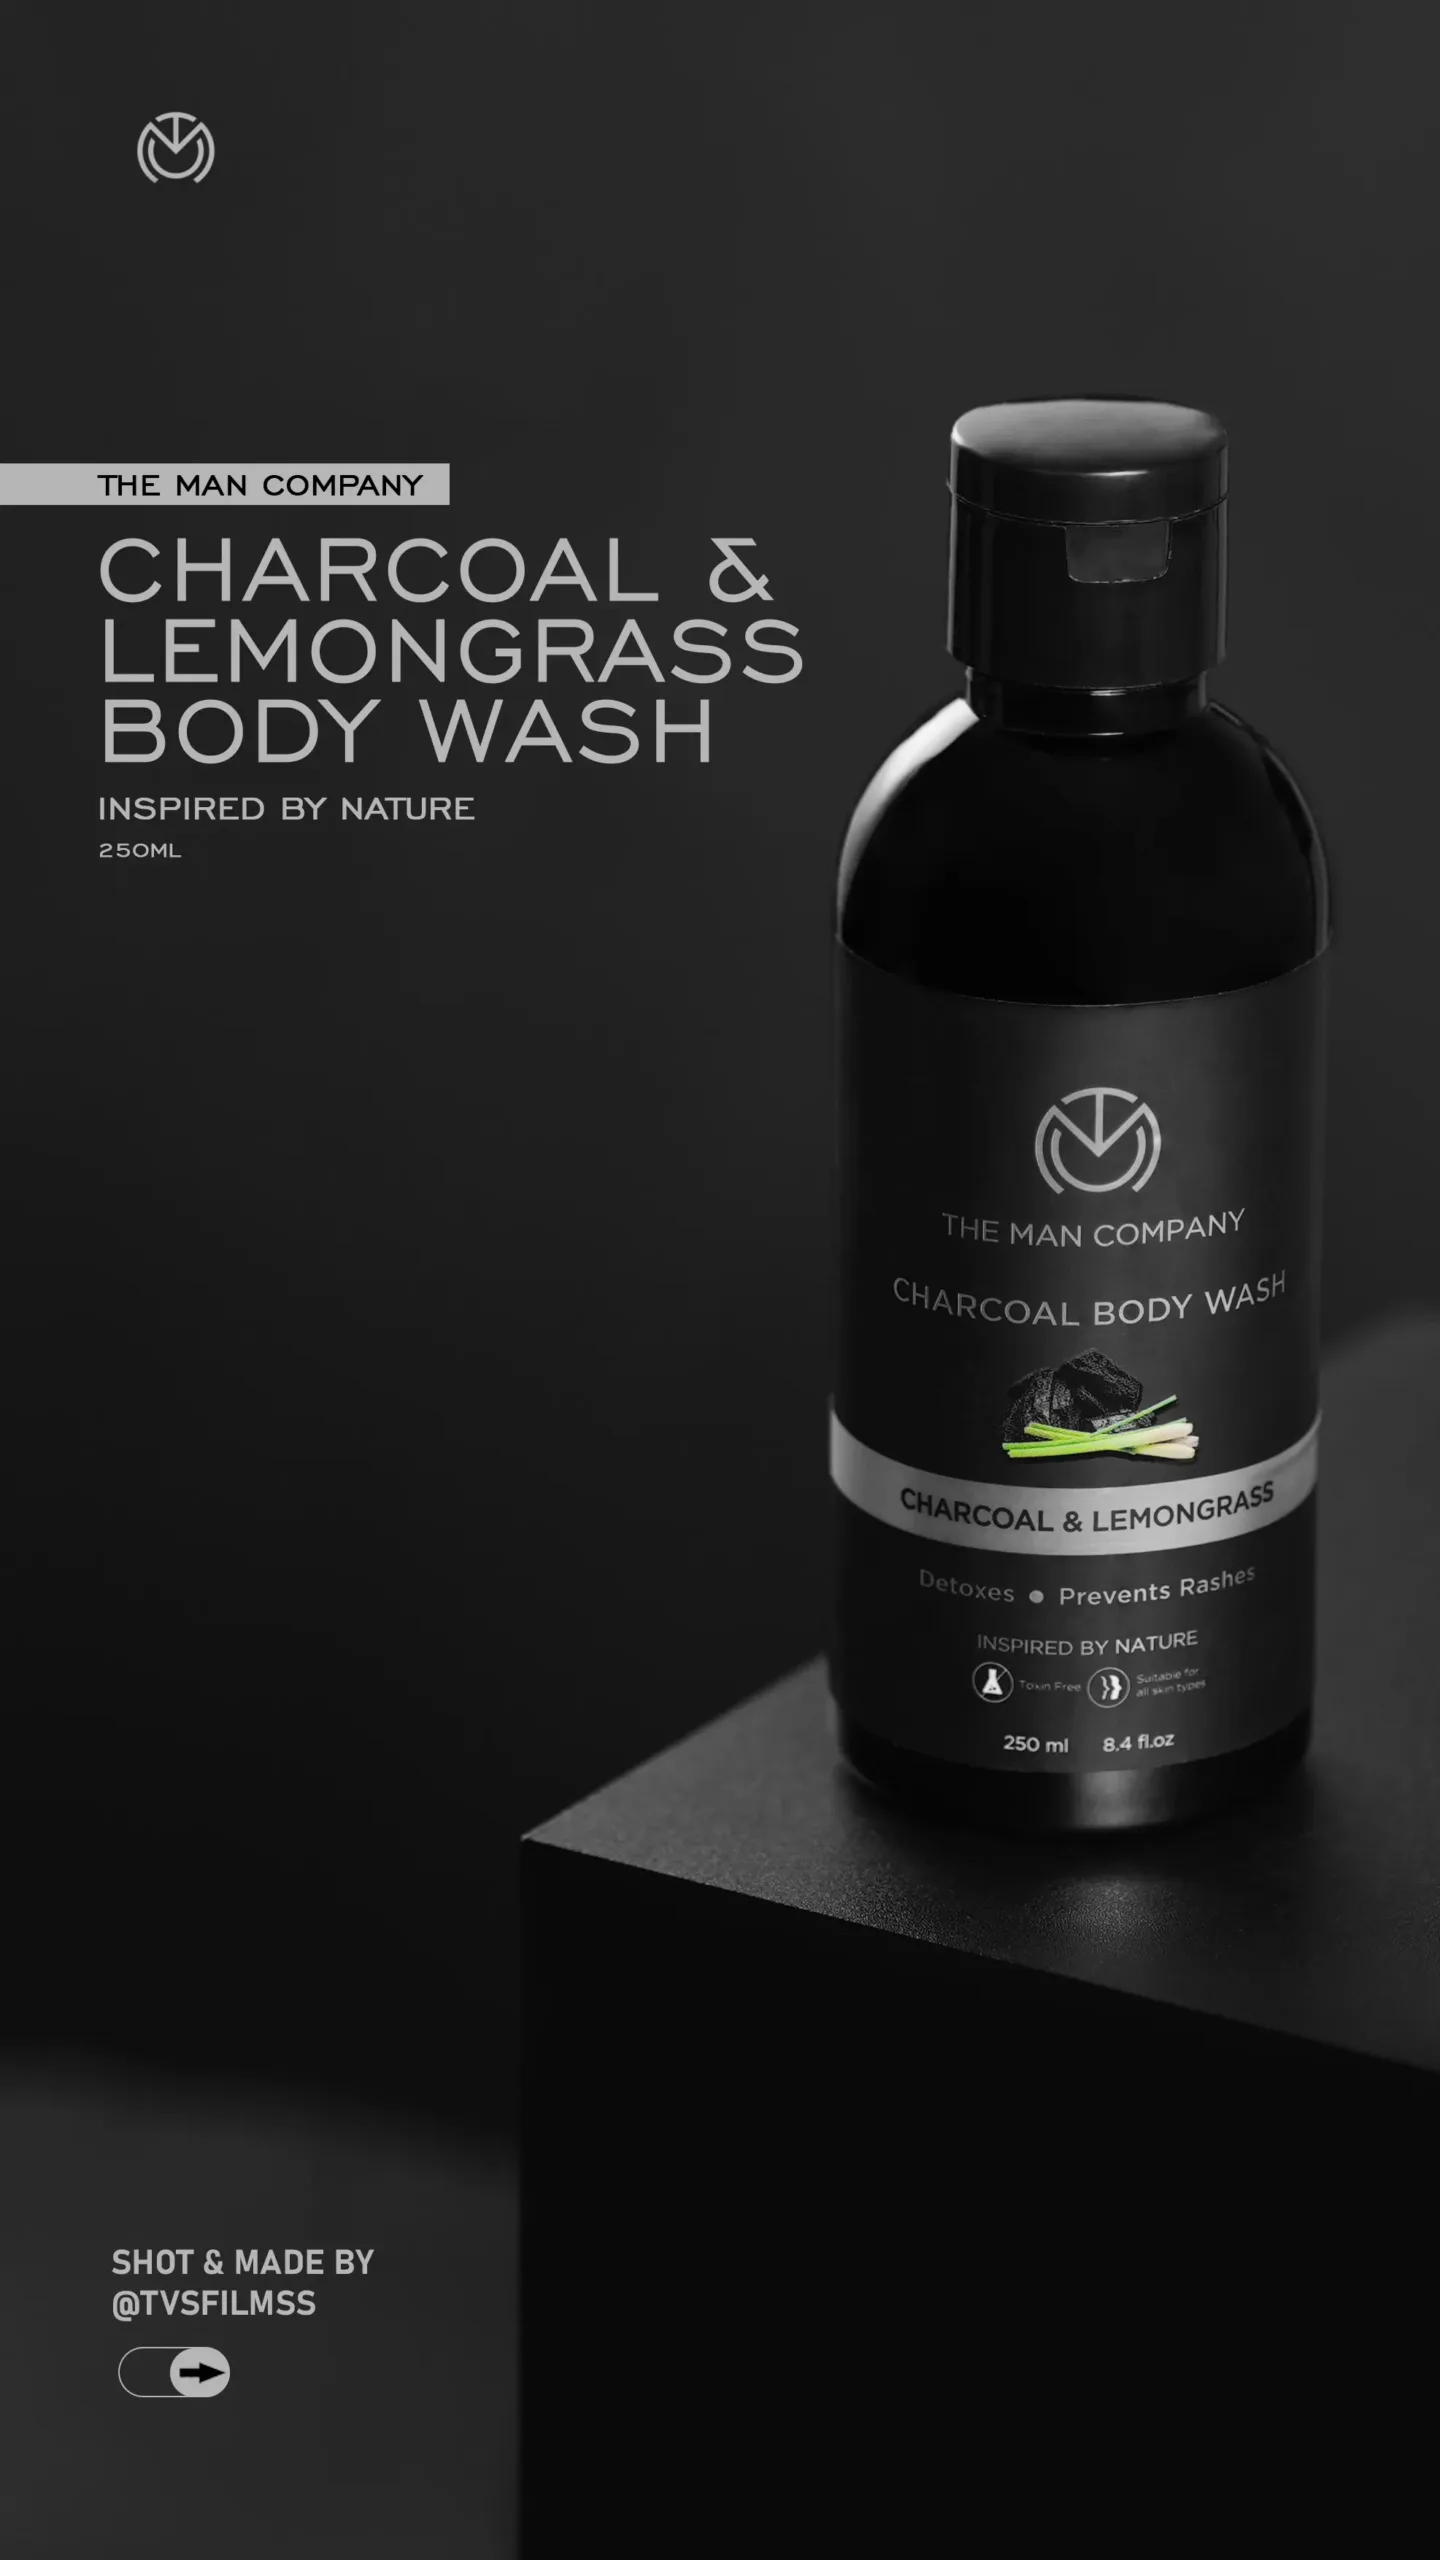
After all the trial and error, the moving of lights, the experiments with the diffuser, and the play with wide frames, we finally had the shots that stood out.
The final photos were a complete transformation compared to the early test shots. Soft, balanced, and professional — they told the story we had in mind from the beginning.
When placed next to the BTS video, the contrast was striking. Viewers could see the raw setup, the back-and-forth of adjustments, and then the polished result. That’s the beauty of BTS: it makes the final photo feel even more powerful because people understand what went into making it.
Why Sharing BTS Matters
For us, sharing the BTS isn’t about showing off the process. It’s about education and storytelling.
- It teaches newcomers about real techniques — like why diffusers are essential or how wide frames change the mood.
- It builds transparency — audiences see that professional photography isn’t magic; it’s careful planning and creativity.
- It creates connection — people love seeing the messy, human side before the polished result.
And honestly, for us as creators, BTS is fun. It’s where the mistakes happen, where unexpected ideas show up, and where teamwork makes the difference.
Final Thoughts
That one-minute BTS video was more than just content for a social handle. It was a reminder of why we love photography. The final photos looked beautiful, but they carried extra weight because we knew the journey it took to get there.
From setting up the camera and tripod, to fixing lights, to softening everything with a diffuser, experimenting with wide frame shots, and finally arriving at the polished images — every step mattered.
So the next time you see a flawless photo online, remember: behind that single frame lies an entire story of adjustments, experiments, and teamwork. And that story is just as fascinating as the picture itself.